Key Takeaways
- Zero downtime Kubernetes migrations need careful planning with strategies like blue-green deployments, rolling updates, and node pool migrations to maintain continuous application availability
- Pod Disruption Budgets (PDBs) are critical for controlling how many replicas can be unavailable during cluster upgrades
- Regional control planes with multi-zone distribution offer significantly better availability during master upgrades compared to zonal configurations
- Pre-upgrade health checks and thorough testing in staging environments can prevent 90% of common upgrade failures
- Kubecost’s Kubernetes monitoring platform helps teams track resource utilization and cost optimization opportunities during migration processes
Upgrading Kubernetes clusters without disrupting production workloads is the ultimate goal of modern DevOps practices. However, many teams still experience anxiety and midnight maintenance windows when cluster upgrades are imminent. With Kubecost’s specialized Kubernetes monitoring platform, organizations can now confidently track resource utilization and identify optimization opportunities throughout the migration process, ensuring smooth transitions with zero downtime.
Given the rapid pace of today’s digital world, even a few minutes of application downtime can lead to substantial business consequences such as lost revenue, tarnished reputation, and unhappy users. This detailed guide will teach you tested strategies to upgrade your Kubernetes clusters while ensuring that your applications are always up and running.
Why do Kubernetes Upgrades Often Result in Downtime?
Upgrading Kubernetes is infamous for being a complex process because it affects all levels of your infrastructure. The distributed structure of Kubernetes requires that changes to the control plane, worker nodes, and application deployments be perfectly coordinated to avoid any disruption of services.
Conventional upgrade methods often necessitate temporarily shutting down components, which can lead to API unavailability, pod evictions, and application restarts. If you don’t plan properly, these disruptions can ripple through your system, impacting end users and violating the promise of continuous availability that modern cloud applications make.
Here are the most frequent causes of downtime when upgrading Kubernetes:
- Insufficient redundancy in control plane components
- Improper pod scheduling during node drains
- Missing Pod Disruption Budgets (PDBs) for critical workloads
- Incompatibility between application versions and the new Kubernetes API
- Inadequate resource capacity to handle workload migrations
Proven Zero Downtime Upgrade Strategies for Kubernetes
Achieving zero downtime during Kubernetes upgrades isn’t magic—it’s methodical engineering. Several battle-tested approaches exist, each with specific advantages depending on your infrastructure setup and organizational constraints. The key is selecting the right strategy for your particular environment and implementing it with precision.
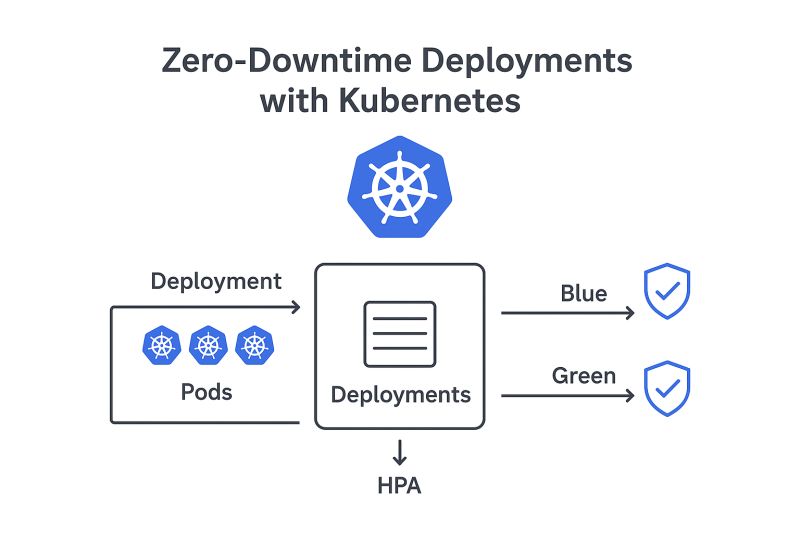
Blue-Green Deployment Approach
The blue-green deployment method is about setting up a completely new cluster (green) next to your current production cluster (blue). This strategy offers total separation between environments, reducing risk and enabling thorough validation before redirecting traffic. By setting up a parallel cluster with the updated Kubernetes version, you can carefully test and confirm compatibility while your production tasks keep running uninterrupted on the original cluster.
Strategy of Rolling Updates
Rolling updates are the default upgrade strategy of Kubernetes. They work by systematically upgrading nodes in groups, ensuring that a certain number of pods are always available. The Kubernetes scheduler will automatically move workloads to available nodes while others are being upgraded. You need to set up Pod Disruption Budgets correctly to make this strategy work, specifying how many replicas can be down at any one time.
Node Pool Migration Strategy
For managed Kubernetes services such as GKE, EKS, and AKS, the node pool migration strategy provides a seamless solution for zero downtime upgrades. This strategy involves setting up a new node pool with the updated Kubernetes version, then slowly moving workloads from the old pool to the new one. The migration process takes into account pod disruption budgets and affinity rules, ensuring that services continue uninterrupted while the underlying infrastructure changes.
Canary Deployments for Careful Teams
Canary deployments offer a more measured strategy to Kubernetes upgrades. By sending a tiny fraction of traffic to workloads operating on the upgraded infrastructure, you can keep an eye out for problems before fully committing to a migration. This strategy is especially useful for companies with stringent reliability needs or intricate application architectures that may be susceptible to Kubernetes version alterations.
Must-Do Pre-Upgrade Checklist
Before you start upgrading your Kubernetes, you need to prepare. A well-done pre-upgrade checklist can help you avoid a production outage and make your transition seamless. If you take the time to evaluate your current environment, you’ll have a better chance of successfully migrating without any downtime.
Evaluating the Health of Your Cluster
Start by assessing the health of your Kubernetes cluster. Any existing issues or components that are already unhealthy will only become worse during an upgrade and could potentially lead to serious failures. You can use tools like kubectl get componentstatuses and kubectl describe nodes to look for warning signs like frequent node restarts, pod failures, or resource contention.
Think about developing a system to score the health of your cluster, which assesses critical metrics such as the response time of the control plane, etcd latency, and the success rates of API server requests. This initial measurement will be extremely useful when it comes to verifying the success of the upgrade later on.
Understanding Your Resource Needs
When you upgrade Kubernetes, it temporarily puts more strain on your infrastructure. New nodes are created while the old ones are still operating, which means you’ll need twice as much compute power while the upgrade is happening. You can figure out how much you’re currently using by using tools like metrics-server or Prometheus. Make sure you have at least 30% extra CPU, memory, and storage before you start the upgrade.
Checking Your Application’s Compatibility
All applications are not the same in terms of compatibility with different versions of Kubernetes. You should go through the release notes of the Kubernetes version you are targeting and see if there are any changes in the API, deprecations, or removals that could affect your workloads. It is important to test your key applications in a staging environment that is a replica of the target Kubernetes version. This will help you identify any compatibility problems before they have an effect on production.
Planning for Backups
Even with the best laid plans, unexpected issues can crop up during upgrades. Make sure to put in place thorough backup processes for both etcd data and persistent volumes. Tools such as Velero offer backup solutions native to Kubernetes that can capture both the state of the cluster and application data. Make sure your restore processes are functioning as they should by carrying out test recoveries in a controlled environment.
Creating a Communication Strategy
Even when there’s no downtime, migrations still need open lines of communication with all parties involved. Create a comprehensive communication strategy that includes the upgrade schedule, potential situations that could impact the upgrade, and what to do if something goes wrong. If possible, schedule the upgrade during times when website traffic is at its lowest, and make sure that the right people are on hand to deal with any problems that might come up during the upgrade.
Upgrading Master Nodes Without API Downtime
The control plane is the brain of your Kubernetes cluster, so it’s crucial that it’s available during upgrades. A well-architected control plane configuration will prevent API downtime and keep the cluster stable throughout the upgrade process.
Comparing Regional and Zonal Control Planes
The physical location of your control plane components has a direct effect on availability during upgrades. Zonal control planes put all master components in one zone, which means that during upgrades, there’s a single point of failure. On the other hand, regional control planes spread out master components over several zones, which allows for rolling updates without any interruption of API service.
These days, most managed Kubernetes services provide regional control planes as a configuration option. The slight increase in cost for regional configurations is usually worth it due to the significantly improved availability, particularly for production workloads where downtime is not an option.
Optimizing Control Plane for High Availability
For the control plane to be highly available, it is necessary to have a minimum of three master nodes distributed across different failure domains. This configuration guarantees that if one master node goes offline during an upgrade, the API server can still be accessed via the other nodes. For Kubernetes clusters that you manage yourself, consider using tools like kubeadm with external etcd clusters to establish a solid control plane configuration.
When it comes to upgrades, load balancing is key to maintaining control plane availability. By setting up your load balancer to do health checks on API server endpoints and to automatically send traffic to instances that are functioning properly, you create a smooth experience for cluster users. They won’t even know that an upgrade is happening in the background.
Managing API-Dependent Applications During Upgrades
There are applications that depend a lot on the Kubernetes API for normal operation, and these are especially sensitive to control plane upgrades. Controllers such as operators, custom controllers, and applications that use the client-go library need special attention. Implement circuit breakers, exponential backoff, and graceful degradation in these applications to handle temporary API unavailability without causing a domino effect of failures.
How to Upgrade Worker Nodes Without Interruption
Worker nodes are where your applications live and breathe, so you need to tread lightly when upgrading them to avoid any interruptions. By taking a systematic approach to upgrading worker nodes, you can make sure that application pods are moved in a way that doesn’t disrupt service.
1. Cordon and Drain Approach
The cordon function makes a node unschedulable, which means new pods can’t be assigned to it, but existing workloads can still run. This is the first step in the node upgrade process. It separates the nodes that are being upgraded from those that are still actively processing traffic. Use kubectl cordon node-name to start this process for each node in your upgrade batch.
Once the node is cordoned, the drain operation will safely evict pods from the node. This operation will respect termination grace periods and pod disruption budgets. By doing this, applications will have enough time to complete in-flight requests and perform cleanup operations before they are shutdown. The command kubectl drain node-name –ignore-daemonsets –delete-emptydir-data will orchestrate this process. However, you should be careful when using the latter flag because it will delete data in emptyDir volumes.
2. Implementing Pod Disruption Budgets
Pod Disruption Budgets (PDBs) establish guidelines for how many application replicas can be down at the same time during voluntary disruptions, like upgrades. If you want to ensure zero downtime migrations, you need to configure your PDBs correctly. If not, the drain process might evict too many pods at the same time, affecting your application’s availability.
3. Optimizing Batch Size
The size of the batch of nodes being upgraded at the same time greatly influences the length of the upgrade and the stability of the application. If you upgrade a large batch of nodes at once, the upgrade will be completed faster, but there’s a higher chance of resource contention and disruption to the application. It’s best to start with small batches (about 10-15% of your total nodes) and keep a close eye on the health metrics of your application. If the performance stays stable, you can slowly increase the size of the batches.
4. Ensuring Node Health
Once a node has been upgraded, it’s crucial to verify its health before moving onto the next set. Ensure that the node has rejoined the cluster successfully, all system pods (kubelet, kube-proxy, CNI) are functioning as expected, and that application workloads can be scheduled and run without issue. To catch any less obvious problems, set up automated health checks that monitor CPU, memory, network, and storage subsystems.
Strategies for Migrating Stateful Workloads
Stateful applications are especially tricky to upgrade in Kubernetes, as they have persistent data needs and dependencies that must be maintained in a specific order. To ensure that these vital workloads continue to function properly and that their data remains intact, special strategies for migration are necessary.
How to Manage PersistentVolume During Upgrades
PersistentVolumes (PVs) and PersistentVolumeClaims (PVCs) are able to keep their state when pods are rescheduled, but they need to be managed with care during upgrades. If your workloads need to be accessed from multiple nodes at the same time during the migration process, make sure your storage class supports the ReadWriteMany access mode. If your storage classes are limited to ReadWriteOnce, you’ll need to set up the right pod anti-affinity rules to avoid scheduling conflicts when pods are moved from one node to another.
Creating volume snapshots before upgrading adds an extra layer of protection for important data. By using the VolumeSnapshot API, you can create snapshots of all persistent volumes before upgrading. This gives you a way to recover your data if it gets corrupted during the migration. This is especially useful for database workloads, where maintaining the integrity of your data is extremely important.
Upgrading Your Database Without Losing Data
When upgrading Kubernetes, you need to be especially careful with database workloads to avoid losing or corrupting data. If your database is replicated, you should start by upgrading the secondary instances. Keep an eye on replication lag during this process. Once the secondary instances are upgraded, you can perform a controlled failover to these instances. Only then should you upgrade the former primary instances. By taking this step-by-step approach, you can ensure your database is always available during the upgrade and that your data remains intact.
Special Considerations for Stateful Sets
StatefulSets offer order guarantees that are vital for distributed systems such as Elasticsearch, Kafka, or MongoDB. When upgrading clusters that include StatefulSets, you should use the built-in feature for ordered pod termination (the pod management policy “OrderedReady”). This ensures that pods are terminated and recreated in the correct order, which helps to avoid quorum loss and split-brain scenarios that could potentially threaten data consistency.
Typical Problems and Their Solutions
Despite meticulous preparations, some difficulties often come up during Kubernetes zero downtime migrations. Knowing these typical problems beforehand lets you put in place precautionary steps and react efficiently if problems arise during your upgrade.
The most effective upgrade strategies are those that learn from previous migrations, establishing a cycle of continuous improvement that decreases risk with each new upgrade. Make a note of the problems you encounter during each upgrade and adjust your procedures as necessary to create institutional knowledge that will benefit future operations.
Resource Limitations During the Migration Process
One of the most prevalent reasons for upgrade failures is the depletion of resources. As you migrate, your cluster will temporarily need more capacity to manage both the current workloads and the pods that are being scheduled. To prevent applications that require a lot of resources from using too many during the transition, set resource quotas and limits for all namespaces.
Problems with Version Compatibility
Despite Kubernetes having a clear deprecation policy, application compatibility issues are still a common occurrence during major version upgrades. Changes to the API, feature gates, and admission controller can disrupt applications that depend on certain Kubernetes behaviors. Before upgrading production clusters, be sure to carefully review the deprecation notices and breaking changes for the target version.
The version skew policy of Kubernetes defines which versions of components can operate in tandem. In general, components can be one minor version apart at most, though there are specific exceptions. To understand these limitations and plan your upgrade path, refer to the official documentation for your target version.
- Before upgrading worker nodes, control plane components should be upgraded
- The API server can be up to two minor versions newer than Kubelet
- kubectl can be one minor version newer or older than the API server
- Specific version requirements may be required for cloud provider integrations
- Before upgrading clusters, third-party controllers and operators may need to be updated
You might want to consider using tools like Pluto to find deprecated Kubernetes API usage in your manifests and Helm charts. You can update applications proactively by identifying compatibility issues early, rather than troubleshooting failures during the upgrade process.
Network Policy Discrepancies
Network policies can often lead to unforeseen connection problems during upgrades, particularly when CNI plugins are upgraded at the same time as the Kubernetes version. Keep detailed records of your network policies and fully test them in a staging environment before upgrading production. Policies that affect system components like CoreDNS should be given extra attention, as disruptions in this area can cause wide-ranging effects across the cluster.
Practical Automation Tools for Zero Downtime Upgrades
Automation of Kubernetes upgrades significantly lowers the chances of human error and creates processes that are repeatable and dependable. Modern DevOps teams utilize specific tools to manage complex upgrade sequences, ensuring zero downtime while reducing operational load. These tools embody best practices and manage edge cases that would be challenging to handle with manual processes.
kOps: The Go-To for Kubernetes Operations
When it comes to managing self-hosted Kubernetes clusters, Kubernetes Operations (kOps) takes the cake with its built-in support for zero downtime upgrades. It employs a rolling update strategy that automatically cordons and drains nodes, all while keeping pod disruption budgets in check. kOps keeps a detailed state model of your cluster, letting it perform accurate updates without changing configuration settings. For teams that manage their own Kubernetes infrastructure, kOps offers a GitOps-friendly method for cluster lifecycle management that works perfectly with CI/CD pipelines.
Using Cluster API for Managing Infrastructure
Cluster API (CAPI) is a game changer for Kubernetes cluster management. It uses a declarative approach to handle infrastructure provisioning and upgrades. The best part is that it treats clusters as Kubernetes resources. This allows for a uniform upgrade process across different infrastructure providers, whether they’re public clouds or on-premises environments. It even includes built-in support for blue/green node deployments, which makes zero downtime upgrades easier to execute across different environments.
When teams adopt the Cluster API, they gain the advantage of an infrastructure provider abstraction layer. This layer normalizes upgrade procedures, regardless of the underlying platform. This is especially helpful for organizations that have multi-cloud strategies, or those planning to migrate between infrastructure providers in the future.
Tools Specific to Cloud Providers
Leading cloud providers offer unique tools that are specifically tailored to their managed Kubernetes services. GKE Autopilot manages upgrades automatically and guarantees zero downtime, while EKS Managed Node Groups and AKS Node Pools offer similar abilities but with more options for configuration. These tools specific to providers are deeply integrated with their respective platforms, taking advantage of features specific to the cloud like live migration and capacity reservations to enhance the reliability of upgrades. For organizations that are dedicated to a single cloud provider, these native tools often provide the most seamless upgrade experience with the least operational overhead.
Verifying the Upgrade
Just because the upgrade went off without a hitch doesn’t mean you’re in the clear. You need to make sure that everything is running smoothly on the new version of Kubernetes. This will help you catch any small issues before they become big problems and give you peace of mind that the upgrade was successful. Start with the basics and work your way up to the more complex parts of your system.
First, perform basic health checks on your cluster, then move on to more complex, application-specific tests. This step-by-step approach makes it easier to identify problems at the right level of abstraction, making it easier to troubleshoot and quickly fix any issues that arise. Make sure to document your validation process in detail so you can consistently execute it across environments and upgrade cycles.
Checking the Health of Your Application
Start by performing basic connectivity tests to check the health of your application, then move on to validating the functionality of critical business processes. Use synthetic transactions to test key application pathways and ensure that end-to-end functionality is not affected by the upgrade. Keep an eye on metrics specific to your application, such as request latency, error rates, and the success rates of business transactions, to detect any performance regressions or subtle functional problems.
Use canary analysis to compare metrics between components that have been upgraded and those that haven’t during the migration. With tools like Prometheus and Grafana, you can visualize these comparisons and more easily spot any anomalies. Set up alerts for any significant deviations from baseline performance to let operations teams know that they may need to look into potential issues.
Supplement automated tests with exploratory testing carried out by product experts who are familiar with the standard behaviour of the application. Human testers frequently uncover subtle usability problems or visual regressions that automated tests may overlook. This combined method offers thorough validation across both technical and business aspects.
Comparing Performance Metrics
Upgrading your Kubernetes version can have a significant effect on performance, so it’s crucial to conduct thorough performance testing after an upgrade. Make sure you collect detailed performance metrics before the upgrade to create a baseline. You can then compare these to your metrics after the upgrade to see if there’s been any degradation. You should look at both infrastructure-level metrics (such as CPU, memory, and network latency) and application-specific performance indicators (like request throughput and response time percentiles).
After upgrading, it’s important to conduct load testing to ensure the system continues to perform as expected under real-world traffic conditions. Use performance testing tools such as k6, Locust, or JMeter to mimic user traffic patterns and confirm that performance service level agreements (SLAs) are still being met. You should be particularly vigilant with operations that require a lot of resources and API endpoints that could be affected by changes in the underlying Kubernetes implementation.
Testing Your Rollback Process
Despite the best laid plans, there may come a time when you need to rollback an upgrade due to unexpected problems that arise after the upgrade has been completed. It’s important to test your rollback procedures on a regular basis to make sure they will work when you need them. Try to recreate different types of failure scenarios and practice performing rollbacks under pressure to identify areas where the process could be improved and to help your team become more comfortable with the process. Keep in mind that the longer an upgraded system is in use, the more complex the rollback process will be, as new data and changes to the system’s state will need to be maintained during the rollback.
Smooth Out Your Next Kubernetes Upgrade
Planning, the right tools, and a disciplined execution are key to achieving zero downtime during Kubernetes upgrades. By using the strategies outlined in this guide, you’ll be able to turn cluster upgrades from nerve-wracking experiences into routine operational procedures. Keep in mind that zero downtime isn’t just about the technology—it’s about creating a reliability engineering culture that puts user experience first. Start small by putting these practices into place in non-critical environments, then slowly apply them to your production workloads as you become more confident and experienced. With Kubecost’s Kubernetes monitoring platform, you can keep an eye on cluster performance before, during, and after upgrades, ensuring your migration strategy provides the seamless experience your users are looking for.
Common Queries
When you’re mapping out your zero downtime Kubernetes upgrade strategy, you may have some unique questions about how these strategies will work in your own environment. We’ve compiled answers to the most frequently asked questions we get from teams who are rolling out zero downtime upgrades for their Kubernetes clusters.
What is the usual time frame for a zero downtime Kubernetes upgrade?
Several factors such as cluster size, upgrade method, and workload features determine the time it takes to complete a zero downtime Kubernetes upgrade. For smaller to medium-sized clusters (10-50 nodes), a well-planned upgrade usually takes between 4-8 hours. Larger production clusters with hundreds of nodes might take 1-2 days to finish the upgrade while ensuring availability. The main factors that influence the time it takes to upgrade include the number of nodes, the amount of stateful workloads, and the degree of version changes being made.
Several companies prefer to upgrade in stages, beginning with development and staging environments before moving on to production. While this staged strategy lengthens the overall timeline, it significantly mitigates risk by identifying and resolving problems before they affect crucial workloads. Cloud-managed Kubernetes services frequently finish upgrades faster due to their streamlined infrastructure and specialized tools.
Is it possible to upgrade Kubernetes through several major versions at once?
Technically, in some instances, it is possible to upgrade through several major versions of Kubernetes at once. However, it is not recommended for production environments. Kubernetes officially supports upgrades that span only one minor version at a time (for example, from 1.23 to 1.24). If you skip versions, you increase the risk of compatibility issues, API changes, and feature deprecations that could disrupt your applications. Instead, you should implement a progressive upgrade path that moves through each minor version sequentially, validating application compatibility at each step.
Should you need to upgrade across several versions because of support or security needs, you might want to think about using the blue-green deployment strategy. You would set up a new cluster at the version you’re targeting, thoroughly check that your applications are compatible, and then slowly move your workloads over. This approach gives you a clear division between the versions and lets you fully validate everything before you decide to go ahead with the upgrade.
How much extra resources are needed for zero downtime upgrades?
Your Kubernetes cluster should keep a minimum of 30% resource overhead across CPU, memory, and storage in order to facilitate zero downtime upgrades. This is to handle the temporary increase in resource usage during node rotations when new nodes are created before old ones are stopped. The exact amount of overhead needed depends on your upgrade strategy and the characteristics of your workload. Blue-green deployments temporarily use twice the resources, whereas rolling updates use less overhead but need careful capacity planning.
Aside from raw computing resources, you should also consider network bandwidth needs during upgrades. Image pulls from nodes, container image transfers, and data synchronization for stateful workloads can all generate a lot of network traffic. Make sure your network infrastructure can handle this extra load without affecting the performance of your application.
Using cloud environments makes managing capacity during upgrades easier because of their ability to scale elastically. Before you start an upgrade, think about turning on cluster autoscaling. This will automatically provide more nodes as required. If you’re using an on-premises environment with a set capacity, you might need to move non-critical workloads temporarily. This will give you enough room to carry out the upgrade.
- 30% CPU headroom across the cluster
- 25-30% available memory to accommodate pod rescheduling
- Sufficient storage capacity for additional persistent volume replicas
- Network capacity to handle increased traffic during migration
- Quota headroom in cloud environments for additional nodes
How do zero downtime upgrades affect application performance?
When properly executed, zero downtime upgrades should have minimal impact on application performance, though some temporary degradation may occur during the transition period. As pods relocate between nodes, you might observe brief latency spikes, reduced throughput, or increased error rates, particularly for stateful applications or those with complex networking requirements. These effects are typically short-lived and fall within acceptable service level objectives when appropriate pod disruption budgets and resource allocations are in place. Monitoring key performance indicators throughout the upgrade process allows you to detect and address any unexpected performance impacts before they affect end-users.
Is it possible that some workloads cannot be upgraded without experiencing downtime?
Although most modern cloud-native applications can remain available during Kubernetes upgrades, certain types of workloads can be difficult to upgrade. Single-instance stateful applications that do not have built-in replication, such as legacy databases or applications that depend on persistent local storage, may experience a short period of downtime during node rotations. Applications that rely on static node identities, fixed IP addresses, or host-path volumes usually cannot remain perfectly available during upgrades without changes to their architecture.
During upgrades, jobs such as machine learning training, batch processing tasks, and GPU-intensive applications often require special attention. It may be best to schedule these workloads around the upgrade windows instead of trying to keep them available throughout the process. In clusters that serve multiple tenants, it might be a good idea to isolate these difficult workloads on dedicated node pools. These pools can then be upgraded independently of the rest of the cluster.